The intersection of 3-D printing and machine learning
Self-correcting 3-D printers may soon become a reality, as Jack Beuth and Luke Scime have combined machine learning with 3-D printing to enable real time process monitoring.
In the past the applications of metal additive manufacturing, otherwise known as 3-D printing, have primarily been confined to prototyping. Recently, the field has begun to undergo a major transition, as researchers push closer to developing metal 3-D printing as a reliable form of industrial manufacturing. However, there are still major obstacles to tackle before the field can fully make the leap, especially in high-risk applications such as aviation components.
“One of the biggest hurdles between just making a part that looks good and actually putting it on an aircraft is making sure that the part you’re producing doesn’t have flaws in it,” says mechanical engineering (MechE) alumnus Luke Scime.
Scime worked with MechE’s Jack Beuth, director of the NextManufacturing Center, to develop a machine learning algorithm that detects anomalies within a part as it’s being printed—a practice known as process monitoring. The specific type of printing they worked with, laser powder bed fusion, involves spreading a thin layer of powder (just 30 to 60 microns in diameter) and melting it in select areas to form a layer of the printed object. The process is then repeated for the next layer, with each build containing hundreds or thousands of layers. Many of the errors that can occur during a build are due to the incorrect spreading of the powder layer.
The holy grail is to deploy this in a real-time environment where you’re automatically analyzing data, doing something about it, and then moving on.
Luke Scime, Alumnus, Mechanical Engineering, Carnegie Mellon University
The race to develop a practical and comprehensive form of process monitoring is on. Various researchers are attempting to use temperature monitoring, acoustic techniques, spectroscopy, and other methods in order to get the best understanding of what’s happening during a build at the structural level. Limited types of monitoring have already been introduced commercially to some degree; however, most of these rudimentary forms offer only a reading to be interpreted by the machine operator, without any capacity for automated analysis. Scime’s work takes process monitoring to a new height, enabling automated analysis in real time through a computer vision algorithm.
“Computer vision is a term for using data analysis techniques to understand what’s happening in an image,” explains Scime.
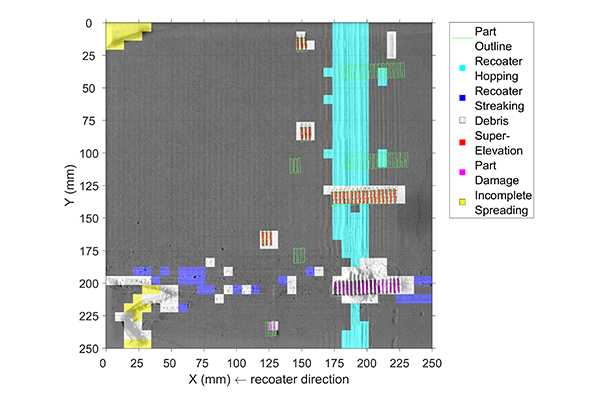
His algorithm takes images of the powder bed and extracts features from the images. It then groups them and compares these images across different levels of analysis, until it can create a unique “fingerprint” of the image. By feeding the algorithm hundreds of training images, already labeled manually with what’s happening in the image, the machine learns to recognize the different flaws and how they appear. From there, the algorithm can take any new images it receives from the machine’s built-in camera, and compare its fingerprint to those from its base of knowledge to successfully isolate anomalies.
In their most recent published paper, Scime and Beuth demonstrated that the algorithm can effectively detect flaws in powder spreading in the millimeter-sized scale range. These flaws have a major effect on process stability, meaning the ability to print. The algorithm is able to spot these errors as they’re developing, and can determine what the flaw is, and where it is occurring.
“The holy grail is to deploy this in a real-time environment where you’re automatically analyzing data, doing something about it, and then moving on,” says Scime.
According to Scime, the advance into self-correcting automation could look a couple different ways. At the most basic end of the spectrum, the machine could send an alert to an operator when it has detected an anomaly, allowing them to address the problem before continuing the build. The next level of sophistication would be automating simple fixes, allowing a machine to recognize a critical flaw and react accordingly. It could, for example, stop printing a certain part while allowing others to continue, or clean the blade that spreads the powder bed, with each response tailored to correct the specific type of anomaly identified.
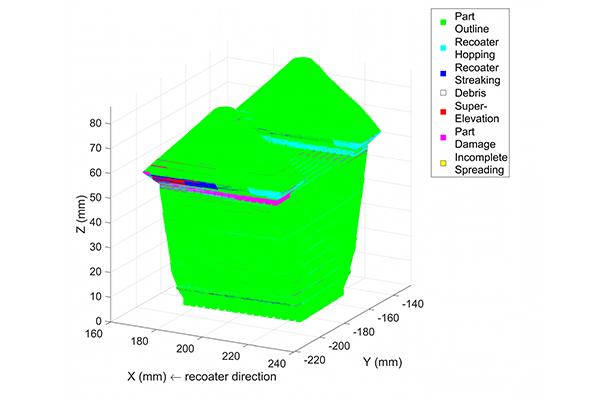
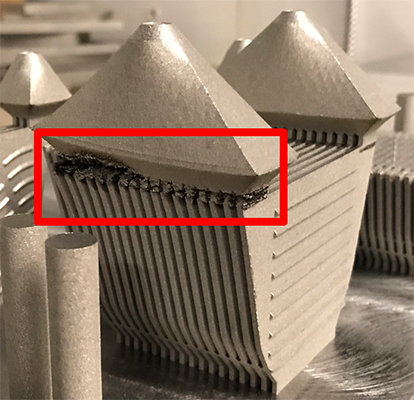
The pinnacle of automated self-correction would be in combating an anomaly known as superelevation. Superelevation is when part of the build begins to warp or curl upwards out of the powder layer, and is responsible for the majority of part damage. Developing an automated way to correct this type of flaw will test the limits of what researchers like Scime are capable of.
Says Scime, “What it really comes down to is, can we detect it, understand that it’s an issue, and then design what we call processing parameters to do something different than we were doing in order to reduce the amount of warpage?”
It may be some time before we reach this level of automation; there are still multiple hurdles left to tackle. Much future work, such as accessing proprietary equipment and integrating software, will rely on researchers’ ability to coordinate with manufacturers. There is also much left to be understood about the effects of changing processing parameters in-build.
Some of Scime’s future interests lie in improving the accuracy of the machine learning algorithm and examining how more sensor data can be incorporated into its analysis. However, the current algorithm has been demonstrated to be effective at accurately identifying a range of anomalies and is ready for application. Scime will be pursuing his post-doctoral training at Oak Ridge National Laboratory, but hopes to continue to collaborate with the college of engineering and Beuth in the future.
Although we may not be 3-D printing 747’s any time too soon, Scime and Beuth’s work is a major step toward making metal additive manufacturing a completely safe and reliable method for industrial manufacturing.


